![]()
CONTENTS
Page Updated:
Mar. 11, 2002
© 2001-02
Tom Gilmore
Best viewed at 1024x768
(The usual disclaimer applies to this installation: you proceed at your own risk and I am not
responsible for any damage that may or may not occur as a result of following these instructions, ok?)
|
Install a catch can (2G DSM)
Prevents oily build up in your intake and keeps you boostin' !
|
A quick review of why you need a catch can in the first place. On our cars, the valve cover is vented back into the
intake track of the turbo system (after the MAS) by a breather hose. Presumably this is to relieve any excess pressure
without losing air that has already been metered by your MAS. Because your engine usually has a bit of blow-by or
frothy oil coming out of that hose though, over time your intake system will get coated in oil. This eventually coats
the inside of your intercooler with a oily film, reducing its cooling efficiency and (worse yet) making your car that
much slower. Do you need any more reasons to install a catch can then?
(BTW, this install will also work for a 1G.)
| The solution in three easy steps |
|
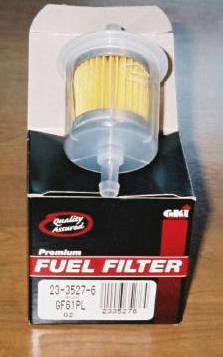
1. Buy a catch can (fuel filter)
In my case, I picked up a $3 fuel filter at Canadian Tire. It was model 23-3527-6 and is made by G.K.I. Ltd of Woodbridge,
ON. It's actually made for older model Fords & Chevys but I liked it because it's see through and small enough. Other
ones you can use are the Purolater F23170 fuel filter (available at Pep Boys for about the same price), or the Fram G2.
It doesn't really matter - I'm sure you can find something similar at Walmart too. There's no need to buy the $100 Greedy
model unless you really want to (if that's your thing see the links below).
Mine came with the filter, 2 sturdy chunks of 8mm hose, and 4 metal clamps. All you really need is the filter and a small
chunk of hose but the other stuff comes in handy.
Note that this one flows bottom to top (there's an arrow pointing up) - this will be important later. |
 |
 |
2. Locate valve breather hose
This is easy, it's the only hose on the left-hand side of the valve cover (you know, the thing that says "16 valve DOHC").
Just pull it off (it will take a bit of tugging the first time) so that the metal 'nipple' is showing on the end of the valve
cover. |
3. Install your filter
Now jam the end of the breather hose you just removed onto the top of your filter. Take the rubber hose supplied with the
filter and connect it between the bottom of the filter and the breather cover nipple. You can supply your own hose here -
you only need about two inches worth but it needs to be the same diameter (8mm inside).
Now clamp the three ends of the hose down to hold it all in place. Again you can use the metal clamps if you want.
I just used some zip ties, to make sure it didn't fall off while driving.
TIP: Make sure the arrow on the filter is pointing away from the valve cover, in the direction the air would flow.
They designed the fuel filter to flow this way, so you might as well install it properly. On some fuel filters both the
in & out nipples are on top and so it won't matter which way you hook it up.
|
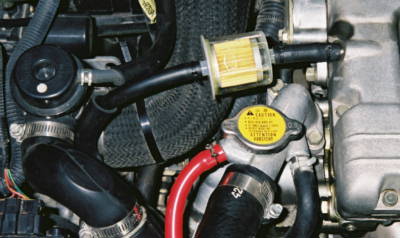
(Click for extreme closeup) |
That's all there is to it !! Over time, you will notice some oil collecting in the bottom of your filter - this is normal.
You just pull it off, dump it out and reinstall as you did above. Simple hey?
Some additional reading on this subject is available here:
|
|
